Slide-In Slideshow
The Slide-In slideshow is a web component written specifically for SiteSpinner. It offers a range of parameters for controlling image slides’ speed, duration, and direction (left-to-right, right-to-left, top-to-bottom, or bottom-to-top). The slideshow operates continuously, requiring no user interaction.
The slideshow uses images from a SiteSpinner permanent group object. You can use multiple slideshows and associated grouped objects on a single page (which can cause longer page loading times and affect performance). You can turn on or off the indicator that shows the current displayed image.
Image selection
The Slide-In slideshow automatically adjusts to the widest and tallest of your images. However, the best visual effect is when the images are the same width and height. I recommend using an external image editing program, such as IrfanView or XnView. Both free programs have batch resizing capabilities.
Use the following steps to add the Slide-In slideshow to your SiteSpinner project
-
Use the "Add a picture" tool (
 ) to bring images into your web project. Then select all the images and put them into a permanent group object using the "Group" tool (
 ). Take note of the Object name or rename this group object (preferred method); you will use this name in a later step. The slideshow web component uses the group name to identify the required images.
-
Select the group object and open the Object Editor (
 ). If you have not added the Object Editor tool button to your toolbar, you can access it via the Quick Edit (
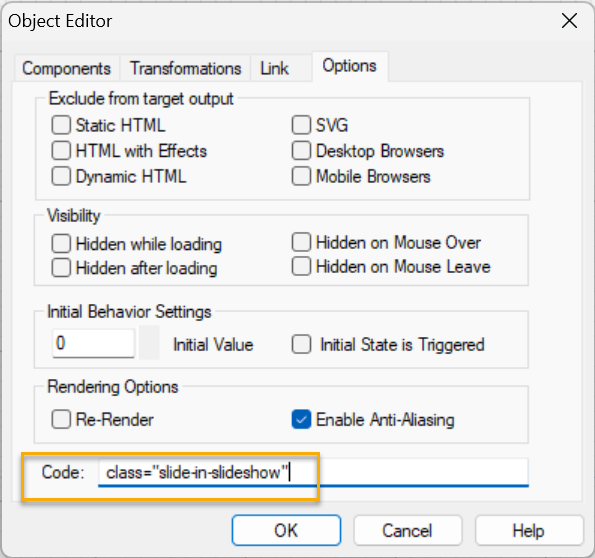
 ) window, or using the main menu Object→Object option, or by pressing the Alt+O keyboard shortcut. Go to the Options tab in the Object Editor window and in the "Code" text field, enter:
class="slide-in-slideshow"

Marking your group object for the slideshow. -
Add the Slide-In web component script to your page using a Code object. Set the Code Placement to "Above End Body Tag" and enter the following code:
The script is hosted from this site. If you want to host the script ("slide-in-slideshow-1.0.min.js") on your site, it is included in the Demp Project zip file. Extract this file from the compressed file and upload it to your server. Also, copy the script file into your Preview folder for local testing. If you decide to self-host, replace the above code with the following:
<script src='https://sitespinner-pages.com/cdn/slideshow-slider-1.0.min.js'></script>
<script src='slideshow-slider-1.0.min.js'></script>
-
To use the slideshow, open a new Code object. Make sure the code placement setting is "in Body". Then enter the following code:
<show-slider transition="direction" duration="display-time
 "t-time="transition-time" img-track="true" />
Use the following table to set the parameter values. If any parameter is omitted, the default value is used.
Parameter Name Description transition Specifies the slide animation direction. Default is “l-r”. Possible values are:
“l-r” (left-to-right)
“r-l” (right-to-left)
“t-b” (top-to-bottom)
“b-t” (bottom-to-top)duration The time in seconds the slide will remain visible (default is “5.0”). transition-time The time in seconds for the animation transition (default is “1.0”). A value of “0” will cancel any transition effect. img-track Specfied if the images position indication is visible; either “true” or “false” (default is “false”).